Nervecentre V9.0 Help for Users
Preparing and administering medications
Depending on your organisation, you can prepare one or more medications and then administer them together. You might know this as 'pot and dot'.
You can prepare and administer regular medications, stat doses, and PRNs Pro Re Nata. It refers to drugs prescribed to be taken as needed, as opposed to at pre-specified intervals.. Before you administer them, you can strike out one medication, or all medications.
You can't prepare fluids or infusions using this method. For information about preparing fluids and infusions, read our article about administering fluids and infusions.
Read more about administering fluids and infusions
Preparing and administering medications on a mobile
You can only prepare medications on Android or desktop, and not on iOS.
 Preparing a medication
You can scan the patient’s wristband before or after scanning the medication.
-
From your patient list, select a patient, or scan a patient's wristband.
-
From Chart, select a prescription.
-
Select a due or overdue dose.
-
To administer a dose of:
-
A regular medication, select Give medicine.
-
A stat medication, select Give stat dose.
-
A PRN medication, select Give PRN.
The 'five rights' appears.
-
-
To view any policies attached to the medication or BNF British National Formulary. The BNF aims to provide prescribers, pharmacists, and other healthcare professionals with sound up-to-date information about the use of medicines. It includes key information on the selection, prescribing, dispensing, and administration of medicines. Medicines generally prescribed in the UK are covered and those considered less suitable for prescribing are clearly identified., select Policy.
-
Complete all mandatory fields.
Mandatory fields are marked .
-
Select Next.
-
Optional: use your mobile's torch to help you scan barcodes.
-
On Android, select
 .
.
-
-
If you did not scan the patient's wristband to enter the patient's record, scan the patient's wristband now.
If you are unable to scan the patient wristband, from Patient not scanned, select
 , and select a reason.
 -
Scan the medication barcode.
If you are unable to scan the medication barcode, from Medicine not scanned, select
, and select a reason. -
When administering a medication, you might need to give more than one unit to complete the dose. For example, two 500 mg paracetamol tablets to make up a 1000 mg dose.
If more than one unit is needed, add extra units in one of the following ways:
-
Enter the number of units to be administered and select OK.
-
Scan the medication barcode once and select OK. Scan the medication barcode again. Repeat until you reach the right number of units.
-
-
If a witness is required:
-
On Android, scan the witness’s QR code.
The witness can access their QR code on their mobile.
Read more about accessing your QR code
If you can't scan the witness's QR code, select Sign and ask the witness to enter their username and password.
-
-
If a countersignature is required:
-
On Android, scan the QR code of the counter-signatory.
The counter-signatory can access their QR code on their mobile.
Read more about accessing your QR code
If you can't scan the QR code of the counter-signatory, select Sign and ask the counter-signatory to enter their username and password.
-
-
Enter any notes.
-
To prepare the medication so you can administer it later, select Prepared.
-
Repeat these steps for each medication that you want to administer.
Striking out a prepared medication
-
From your patient list, select a patient, or scan a patient's wristband.
-
From Chart, select a prescription.
-
Select a cell with Prepared.
-
Select Strikeout > OK.
-
Enter a comment.
Striking out all prepared medications
-
From your patient list, select a patient, or scan a patient's wristband.
-
From Chart, select Discard all.
-
Enter a reason for discarding the doses, then submit.
Administering prepared medications
You can only do this on Android.
When you have prepared all the medications you want to administer, you can administer them. For example, when each tablet you want to administer is in the cup you are going to give to the patient.
-
From your patient list, select a patient, or scan a patient's wristband.
-
Select Chart.
-
Select Give.
A list of prepared medications appears.
-
Select Proceed to give.
-
If you are unable to scan the patient wristband, from Patient not scanned, select
, and select a reason. -
If a witness is required:
-
On Android, scan the witness’s QR code.
The witness can access their QR code on their mobile.
Read more about accessing your QR code
If you can't scan the witness's QR code, select Sign and ask the witness to enter their username and password.
-
-
If a countersignature is required:
-
On Android, scan the QR code of the counter-signatory.
The counter-signatory can access their QR code on their mobile.
Read more about accessing your QR code
If you can't scan the QR code of the counter-signatory, select Sign and ask the counter-signatory to enter their username and password.
-
-
Enter any notes.
-
Select Confirm administered.
Preparing and administering medications on a desktop
Preparing a medication
You can scan the patient’s wristband before or after scanning the medication.
-
From Inpatients > Patient List:
-
Scan the patient's wristband to positively identify the patient before administration.
-
Search for the patient, and double-click on the patient's name.
-
-
Select Meds.
-
From the MAR, select a due or overdue dose.
-
To administer a dose of:
-
A regular medication, select Give medicine.
-
A stat medication, select Give stat dose.
-
A PRN medication, select Give PRN.
Fluids, intermittent infusions, and continuous infusions show different options.
-
-
If a dialogue box appears, complete all mandatory fields.
Mandatory fields are marked .
The 'five rights' appears.
-
To view any policies attached to the medication or BNF British National Formulary. The BNF aims to provide prescribers, pharmacists, and other healthcare professionals with sound up-to-date information about the use of medicines. It includes key information on the selection, prescribing, dispensing, and administration of medicines. Medicines generally prescribed in the UK are covered and those considered less suitable for prescribing are clearly identified., select Policies.
-
If you didn't scan the patient's wristband to enter the patient's record, scan the patient's wristband now.
If no scanner is available, or if there is another reason you are unable to scan the patient's wristband, positively identify the patient manually. In this scenario, the dialogue box is not updated with .
-
Scan the barcode on the medication box to confirm the correct medication, form, and strength.
If an incorrect medication is scanned, a warning appears, and you can't continue with the administration.
If you can't scan the medication barcode, select Confirm without scanning and select a reason.
-
When administering a medication, you might need to give more than one unit to complete the dose. For example, two 500 mg paracetamol tablets to make up a 1000 mg dose.
If more than one unit is needed, add extra units in one of the following ways:
-
Enter the number of units to be administered
-
Scan the barcode on the box of medication once for each unit
displays when you have entered or scanned the correct number of units.
-
-
To remove scanned medication, select Discard scanned meds.
-
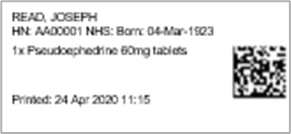
If you scanned a medication, you can print a medication label. To print a patient medication label, select Print label.
For example, a label similar to the one below.
-
If a witness is required, scan the witness’s QR code.
They can access their QR code on their mobile.
Read more about accessing your QR code
If you can't scan the witness's QR code, the witness must enter their username and password.
-
If a countersignature is required, scan the QR code of the counter-signatory.
They can access their QR code on their mobile.
Read more about accessing your QR code
If you can't scan the QR code of the counter-signatory, the counter-signatory must enter their username and password.
-
Enter any notes
-
To prepare the medication so you can administer it later, select Click to confirm prepared.
-
Repeat these steps for each medication that you want to administer.
Striking out a prepared medication
-
From Inpatients > Patient List > double-click on a patient's name > Patient Detail, select Meds.
-
Select a cell with Prepared.
-
Select Strikeout.
-
Enter a reason, then save.
Striking out all prepared medications
-
From Inpatients > Patient List > double-click on a patient's name > Patient Detail, select Meds.
-
From the top of the MAR, select Discard Prepared Doses.
-
Enter a reason.
-
Select Confirm.
Overview of Confirm Medicine Taken
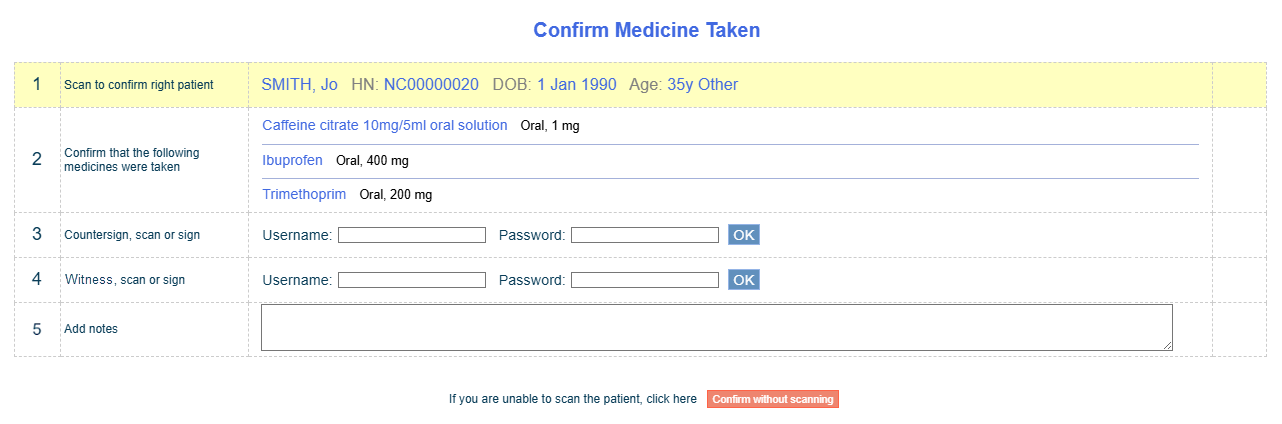
When you administer prepared medications, the dialogue box with the title Confirm Medicine Taken appears. This is similar to the 'five rights' screen.
|
Scan to confirm right patient |
Shows information about the patient. Scan the patient's wristband to administer the medication. If no scanner is available, or if there is another reason you are unable to scan the patient's wristband, select Confirm without scanning and select an option. |
|
Confirm that the following medicines were taken |
Shows a list of medications that have been prepared and are ready to administer. |
|
Countersign, scan, or sign |
If a counter-signatory is required, this appears. Scan the QR code of the counter-signatory. If you can't scan their QR code, ask them to enter their username and password. |
|
Witness, scan, or sign |
If a witness is required, this appears. Scan the witness's QR code. If you can't scan their QR code, ask them to enter their username and password. |
|
Add notes |
Enter any notes. |
|
Confirm without scanning |
Select this if you can't scan the patient's wristband. |
|
Click to confirm given |
This appears after you scan the patient's wristband. Select to confirm that the medication was administered. |
Administering prepared medications
When you have prepared all the medications you want to administer, you can administer them. For example, when each tablet you want to administer is in the cup you are going to give to the patient.
-
From Inpatients > Patient List:
-
Scan the patient's wristband to positively identify the patient before administration.
-
Search for the patient, and double-click on the patient's name.
-
-
Select Meds.
-
From the top of the MAR, select Confirm Given.
A dialogue box appears with the title Confirm Medicine Taken.
-
If you didn't scan the patient's wristband to enter the patient's record, scan the patient's wristband now.
If no scanner is available, or if there is another reason you are unable to scan the patient's wristband, select Confirm without scanning and select an option.
-
If a witness is required, scan the witness’s QR code.
They can access their QR code on their mobile.
Read more about accessing your QR code
If you can't scan the witness's QR code, the witness must enter their username and password.
-
If a countersignature is required, scan the QR code of the counter-signatory.
They can access their QR code on their mobile.
Read more about accessing your QR code
If you can't scan the QR code of the counter-signatory, the counter-signatory must enter their username and password.
- Enter any notes.
- Select Click to confirm given.
Did you find this article helpful? Yes No
Sorry about that. Our help is a work in progress and we welcome any feedback.
Why wasn't this helpful? Please select one reason:
Great!
Thanks for taking the time to give us some feedback.